iPhone/iPod touch
|
iPhone/iPod touch |
 |
iPad |
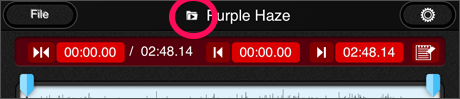
Go to the file selection screen. |
Go to the settings screen. |
 |
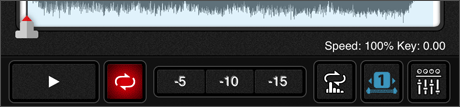
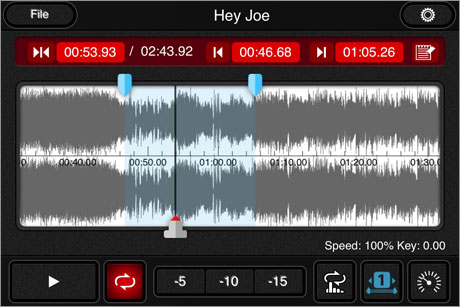
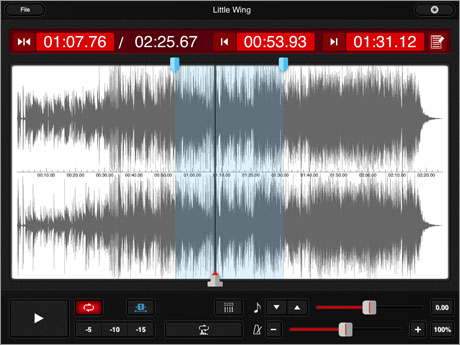
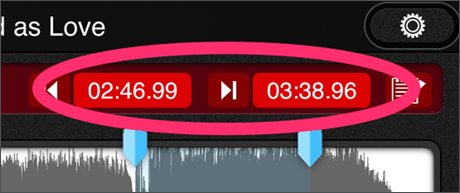
Waveform view. Pinch to zoom in and out. Top cursors indicate the loop range. Bottom cursor indicates the current position. Drag the cursors to change the settings. |
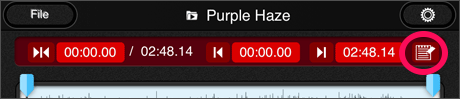
From the left: current position and total length of the current track, start position of the loop, and end position of the loop. Drag the corresponding cursors to change the settings. |
 |
Start/stop button. |
  |
Loop ON/OFF button. The button is lit when loop is ON. |
 |
"Quick Rewind" buttons. Tap to rewind by the shown number of seconds. The number of seconds can be changed on the settings screen. |
 |
Switch to Quick Loop Setup mode. (See detail) |
 |
Switch to Speed Control mode. |
 |
Switch to Audio Routing Confing mode. |
 |
Select the Loop Intervals. (Feature of Pro version. See here) |
 |
Open Memo pad. (Feature of Pro version. See here) |
  |
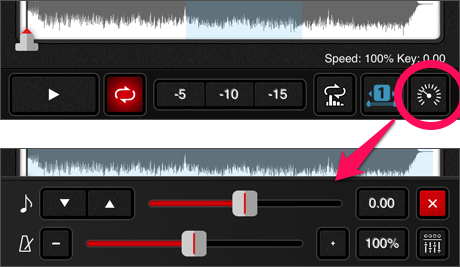
On an iPhone or iPod touch, tap the speedometer button at the bottom right corner of the main view. Controls for changing the playback speed and pitch will be displayed. Changing the pitch |
|
|
|
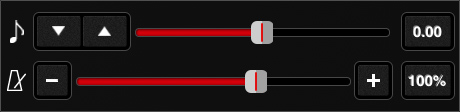
 Indicates the current pitch. Tap to reset to the original pitch. Indicates the current pitch. Tap to reset to the original pitch. |
|
Changing the playback speed
|
Slider: You can also use the slider to change the playback speed. Double-tap the knob to reset the playback speed. |
 Indicates the current playback speed. Resets the playback speed to 1x. Indicates the current playback speed. Resets the playback speed to 1x. |
 Close: Exits the Speed Control mode. (Not shown on an iPad.) Close: Exits the Speed Control mode. (Not shown on an iPad.) |
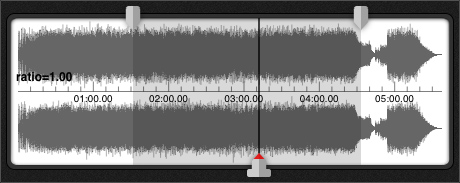
It's a feature that enables you to replay (loop playback) the sound between two points in a track. How to Specify the Loop IntervalsSelect the start and end points by dragging the loop specification markers.
You can also finely adjust the loop start and end points by dragging the time display up and down on the image below.
Tap the How to Select the Loop IntervalsTap the loop selecting button (see image below) to display the list of loops and to select the loop interval that you'd like to use. When you select the loop interval, the current active loop interval will be displayed on the button.
(*1)The feature on the pro version allows you to select two or more loop intervals. You can either sign up for a user registration for free or you need to upgrade to the pro version within the app. Click here for user registration. |
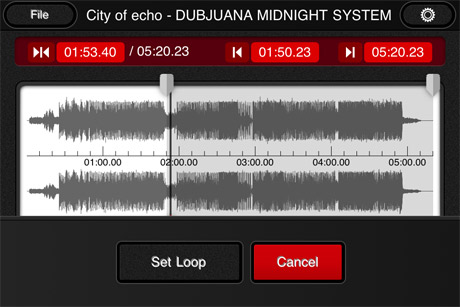 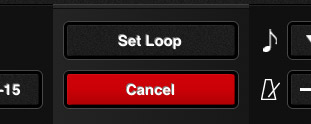 |
You can easily set the start/end position of a loop while playing back a track. Tap the |
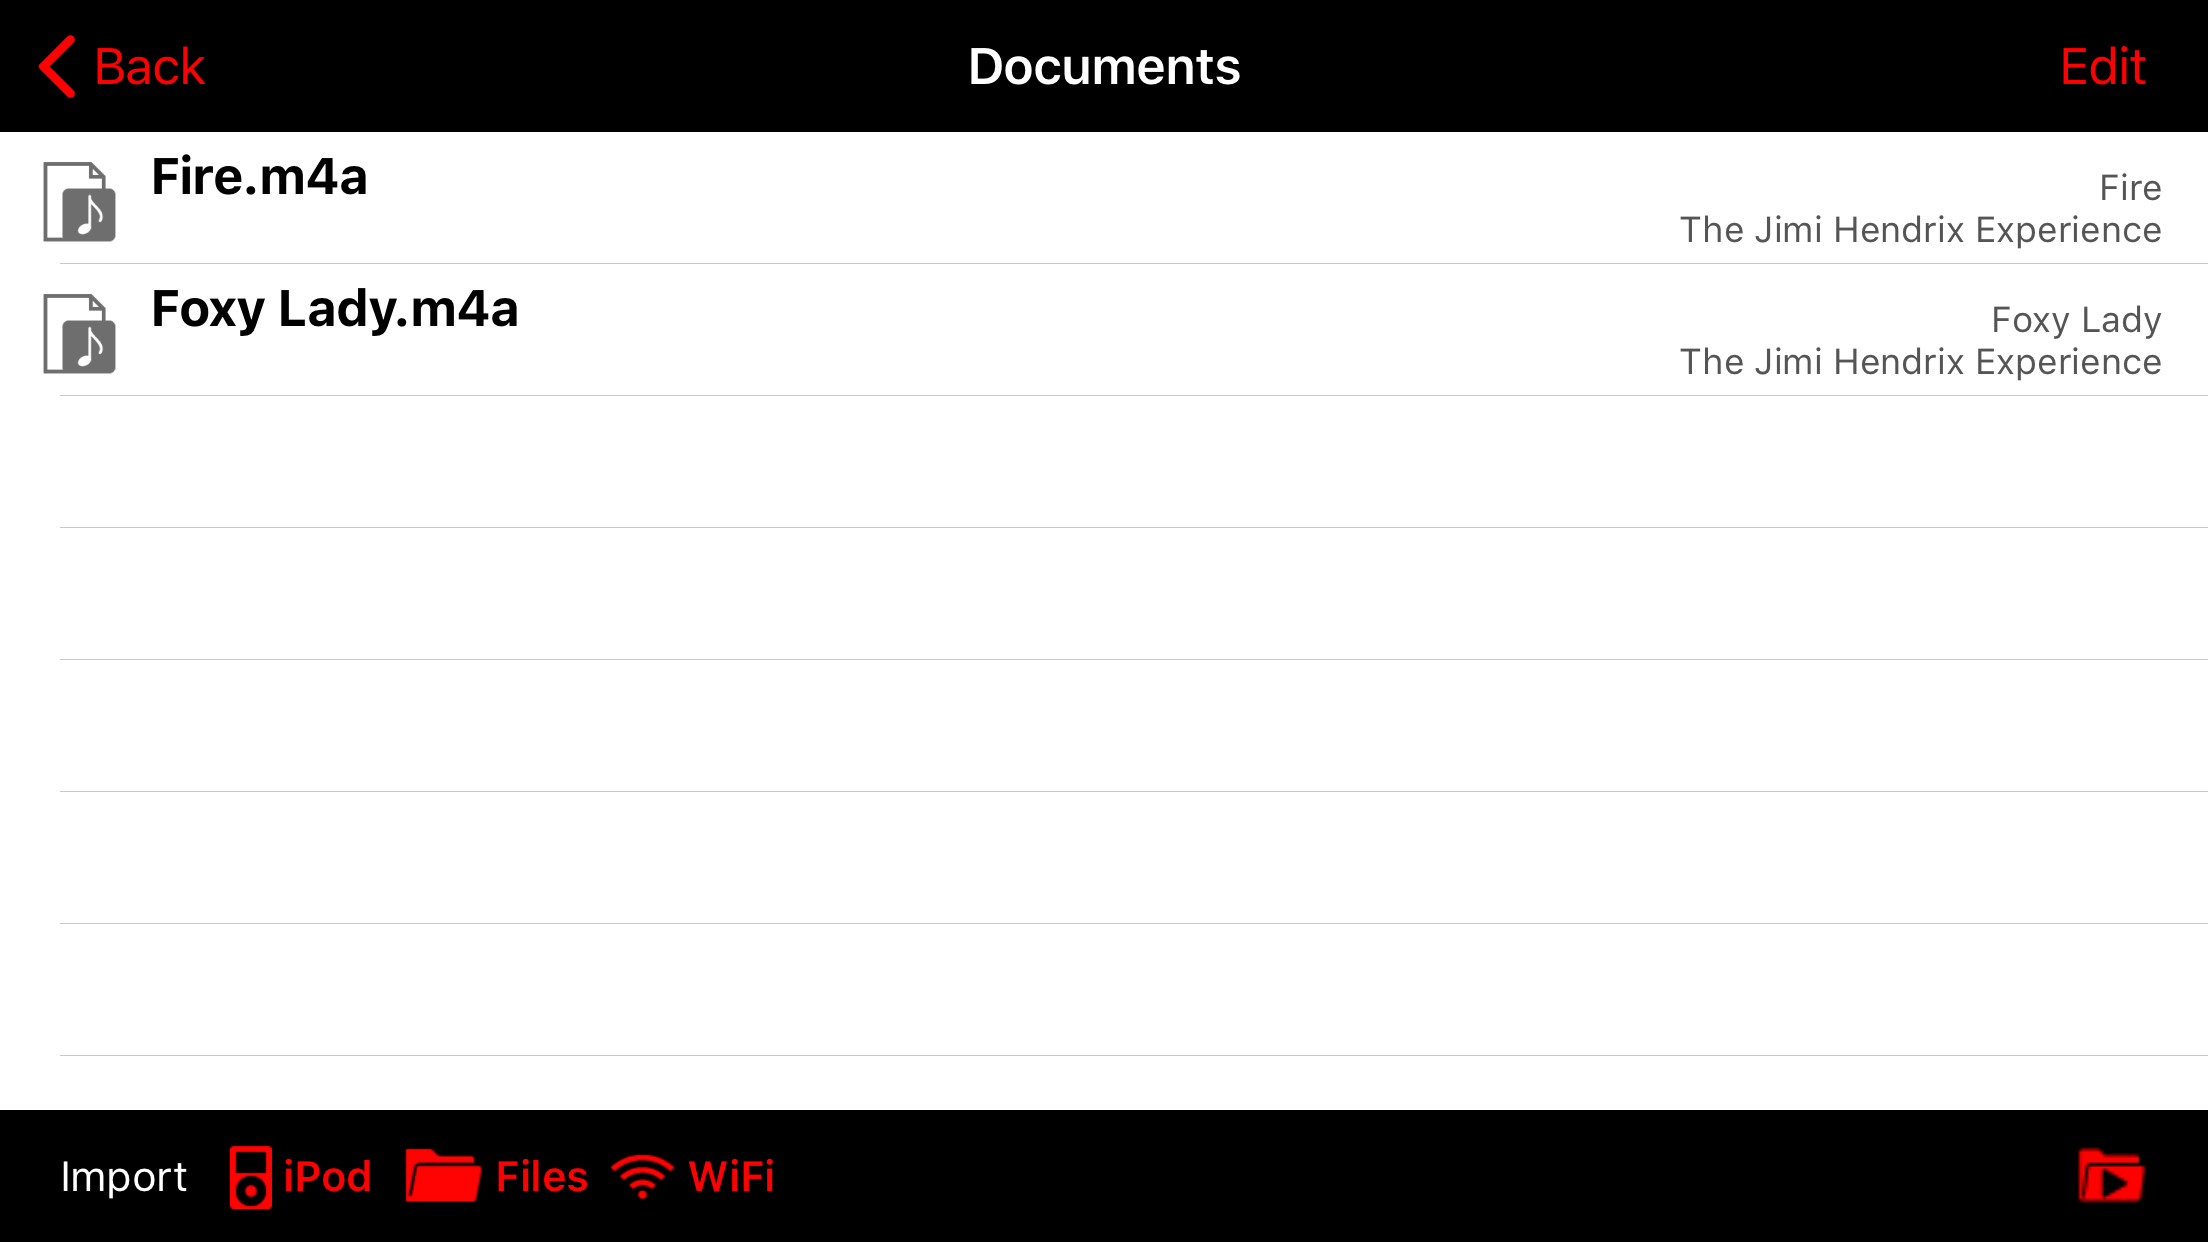 |
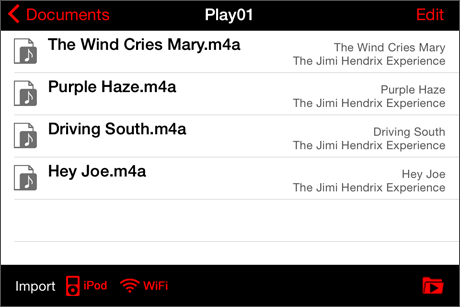
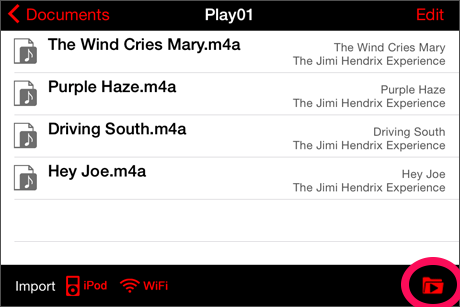
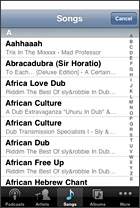
Tap the list to load a file (track) into mimiCopy. The listed files are available for waveform view and time stretching.
|
Opens the Import Music(iPod) Library screen.(See details) |
Open the iOS standard "Files" app from within mimiCopy. You can open files in your device or in the cloud, such as iCloud. To open a file in the cloud, you may need to install the corresponding cloud application or configure it in the "Files" app. You can open files in other apps if the app supports it. The following screen will appear. 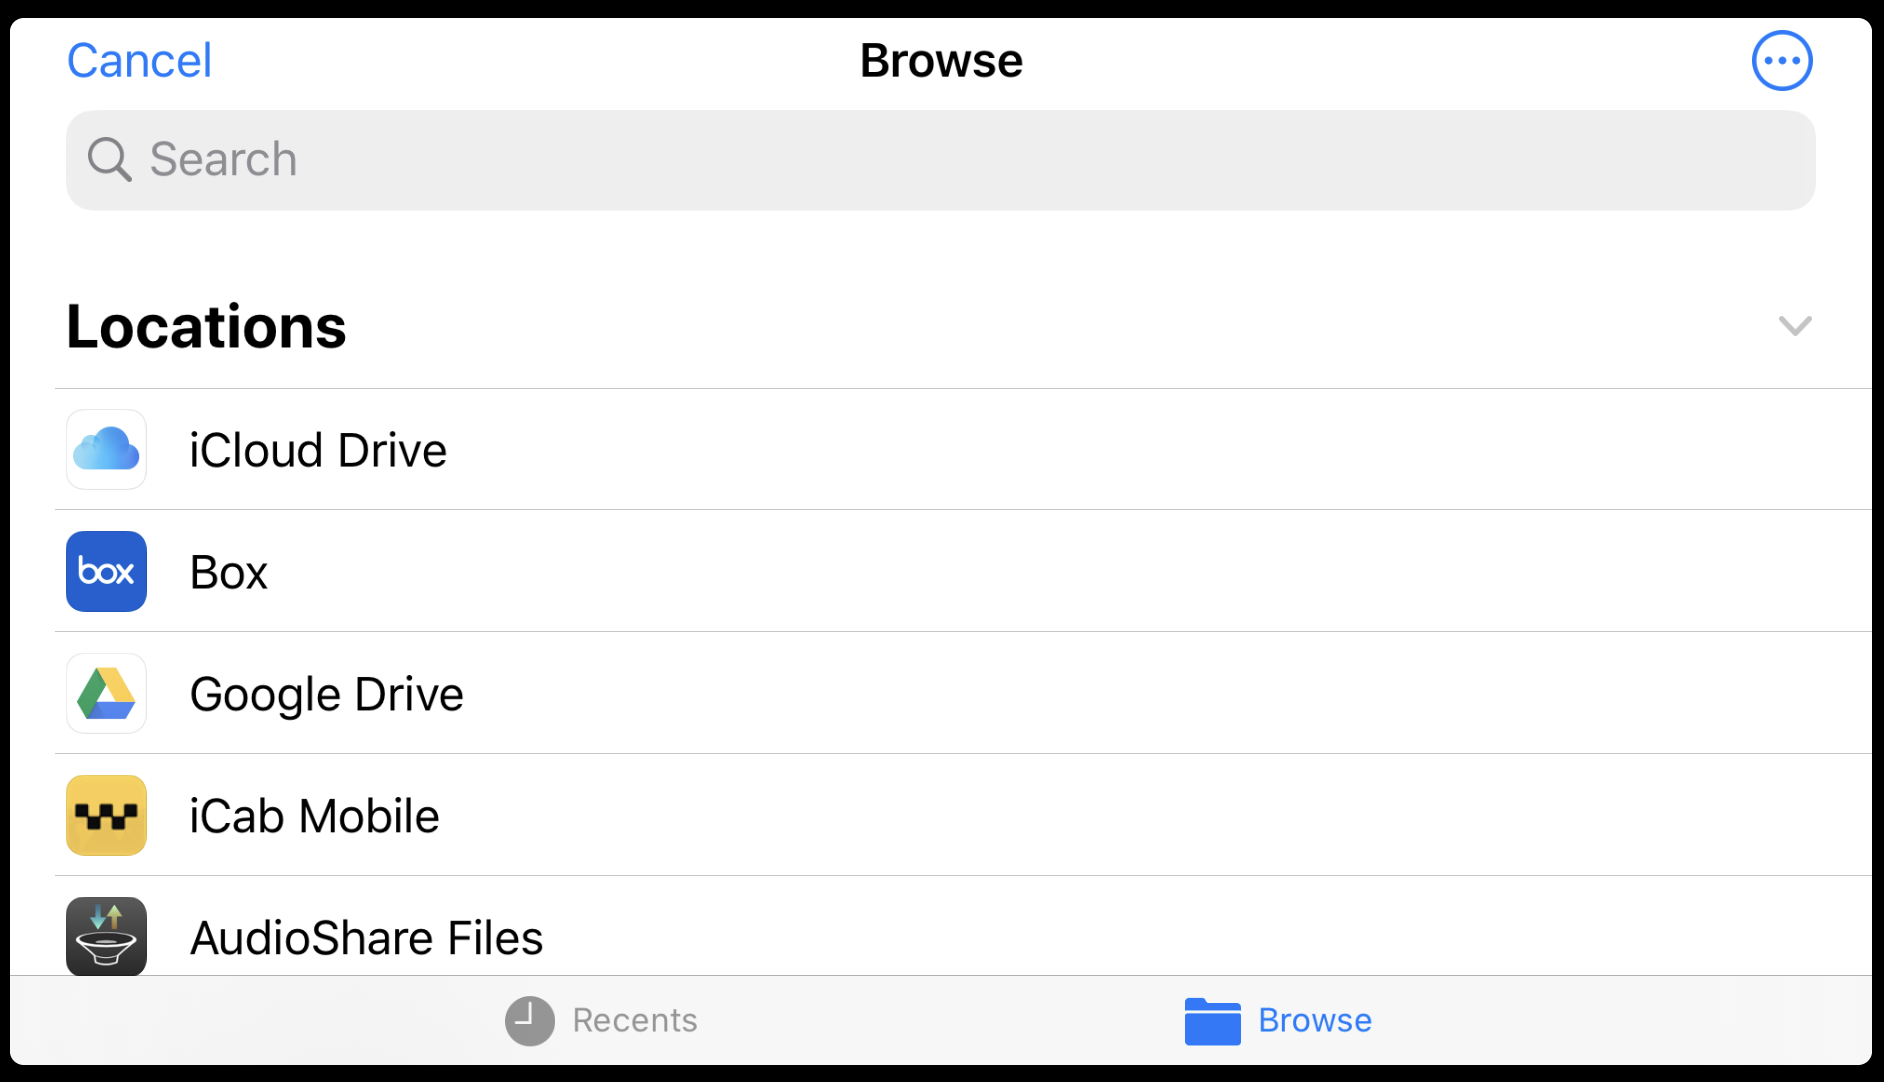
|
Opens the WiFi Transfer screen.(See details) |
Opens the Library Selection screen for using the app as an audio player(*). This button is not shown default settings. You can turn it on by setting screen (Use the iPod Player option). (*) In this case, mimiCopy will simply control your iPod's playback function, and the tracks are not loaded into the app. For this reason, waveform view and speed control will be disabled. |
This button is displayed on the lower right side of the setting screen when "Use the iPod player" is turned on. This feature is OFF by default, and this button is also hidden. Note that the waveform display and speed cannot be changed even if you select a song from this button. |
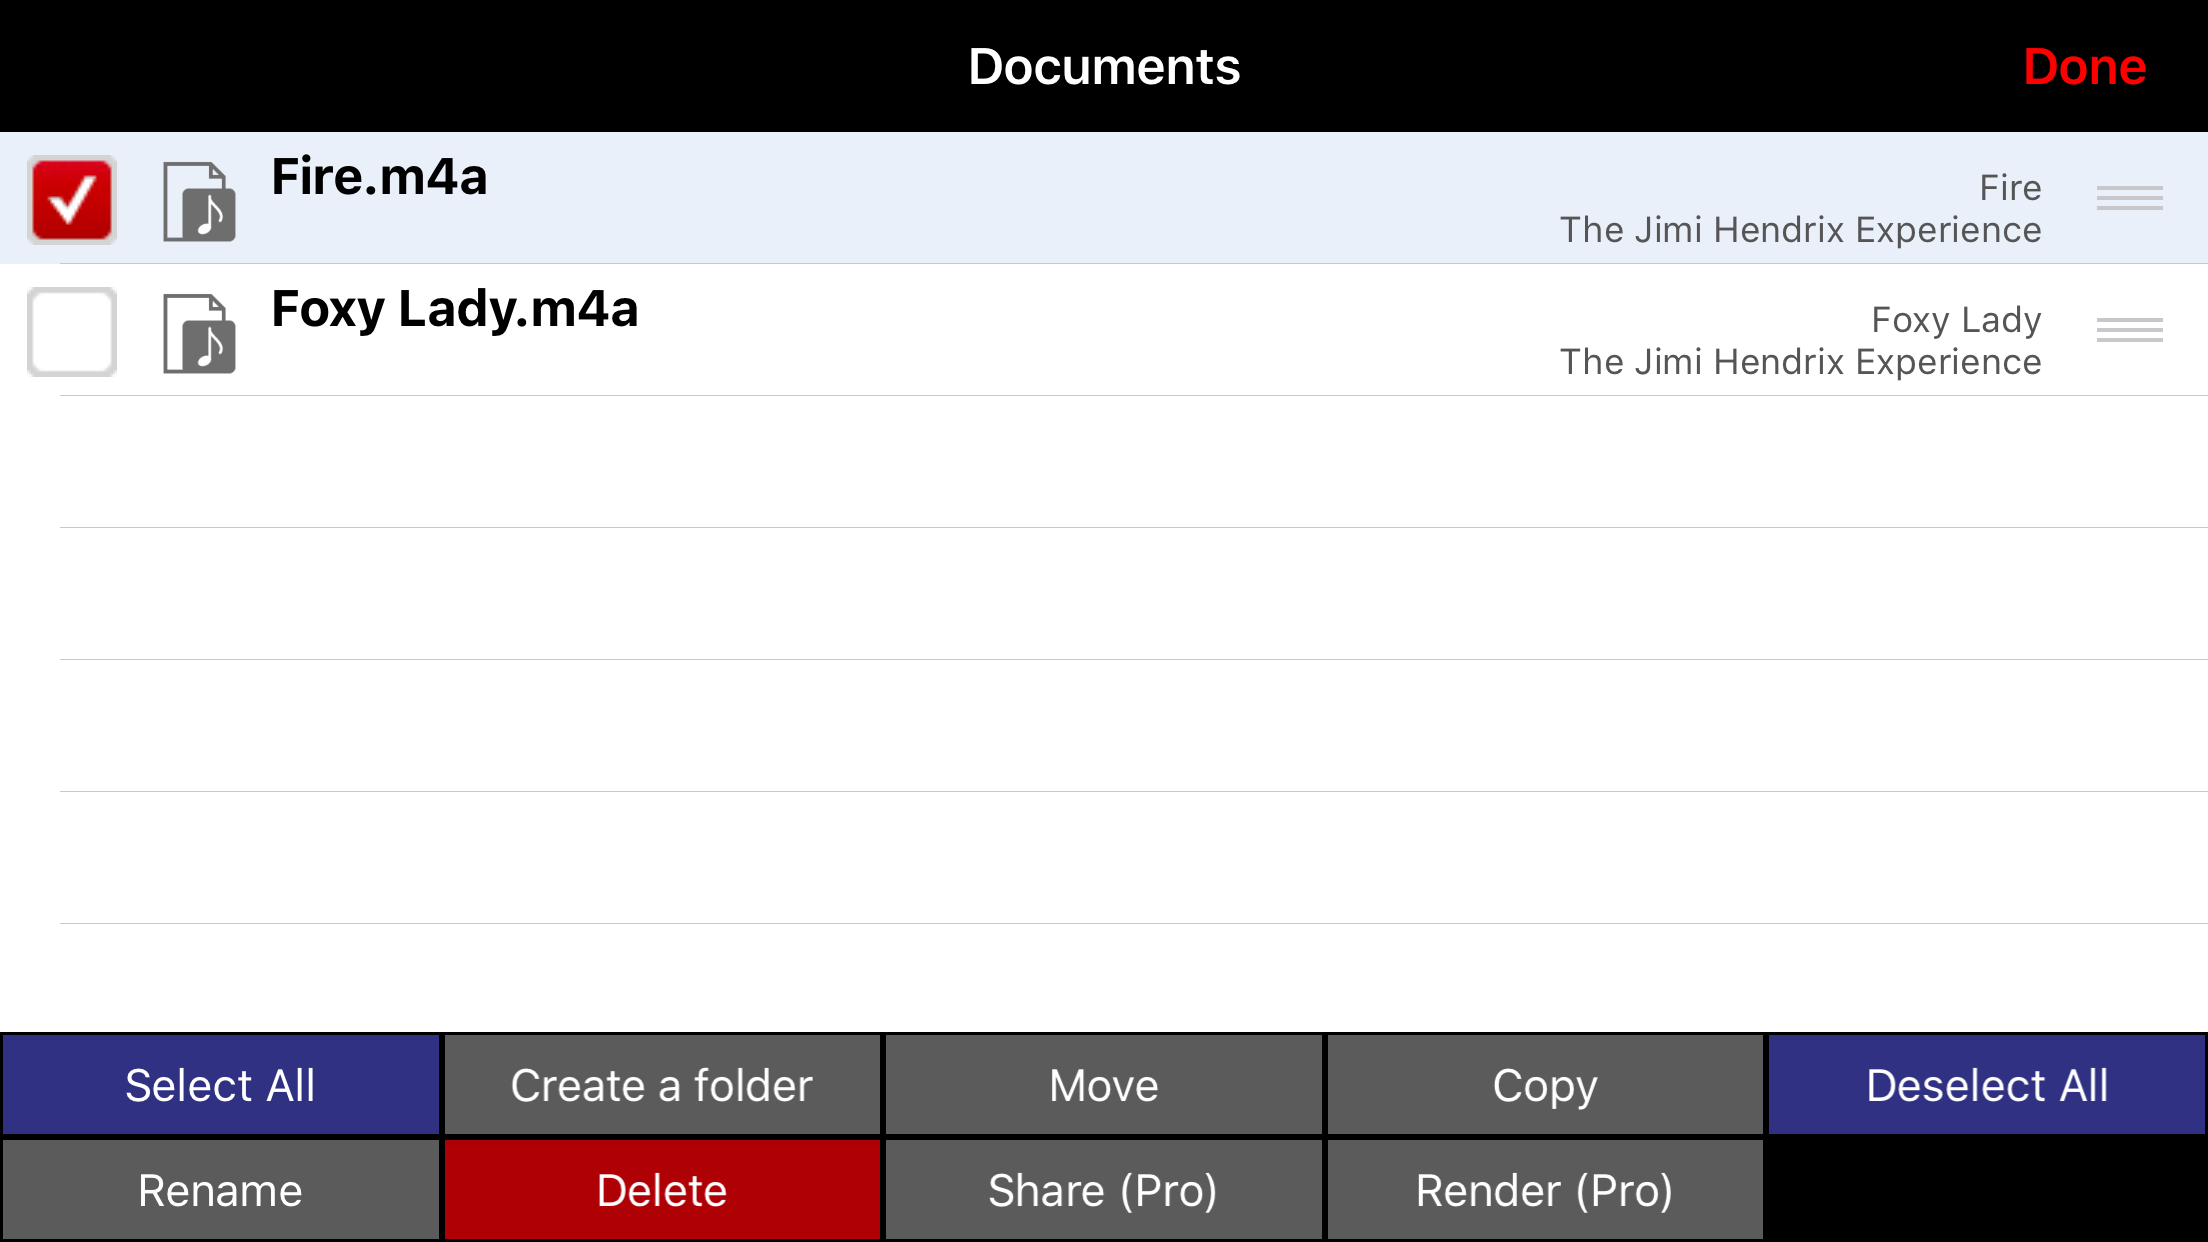
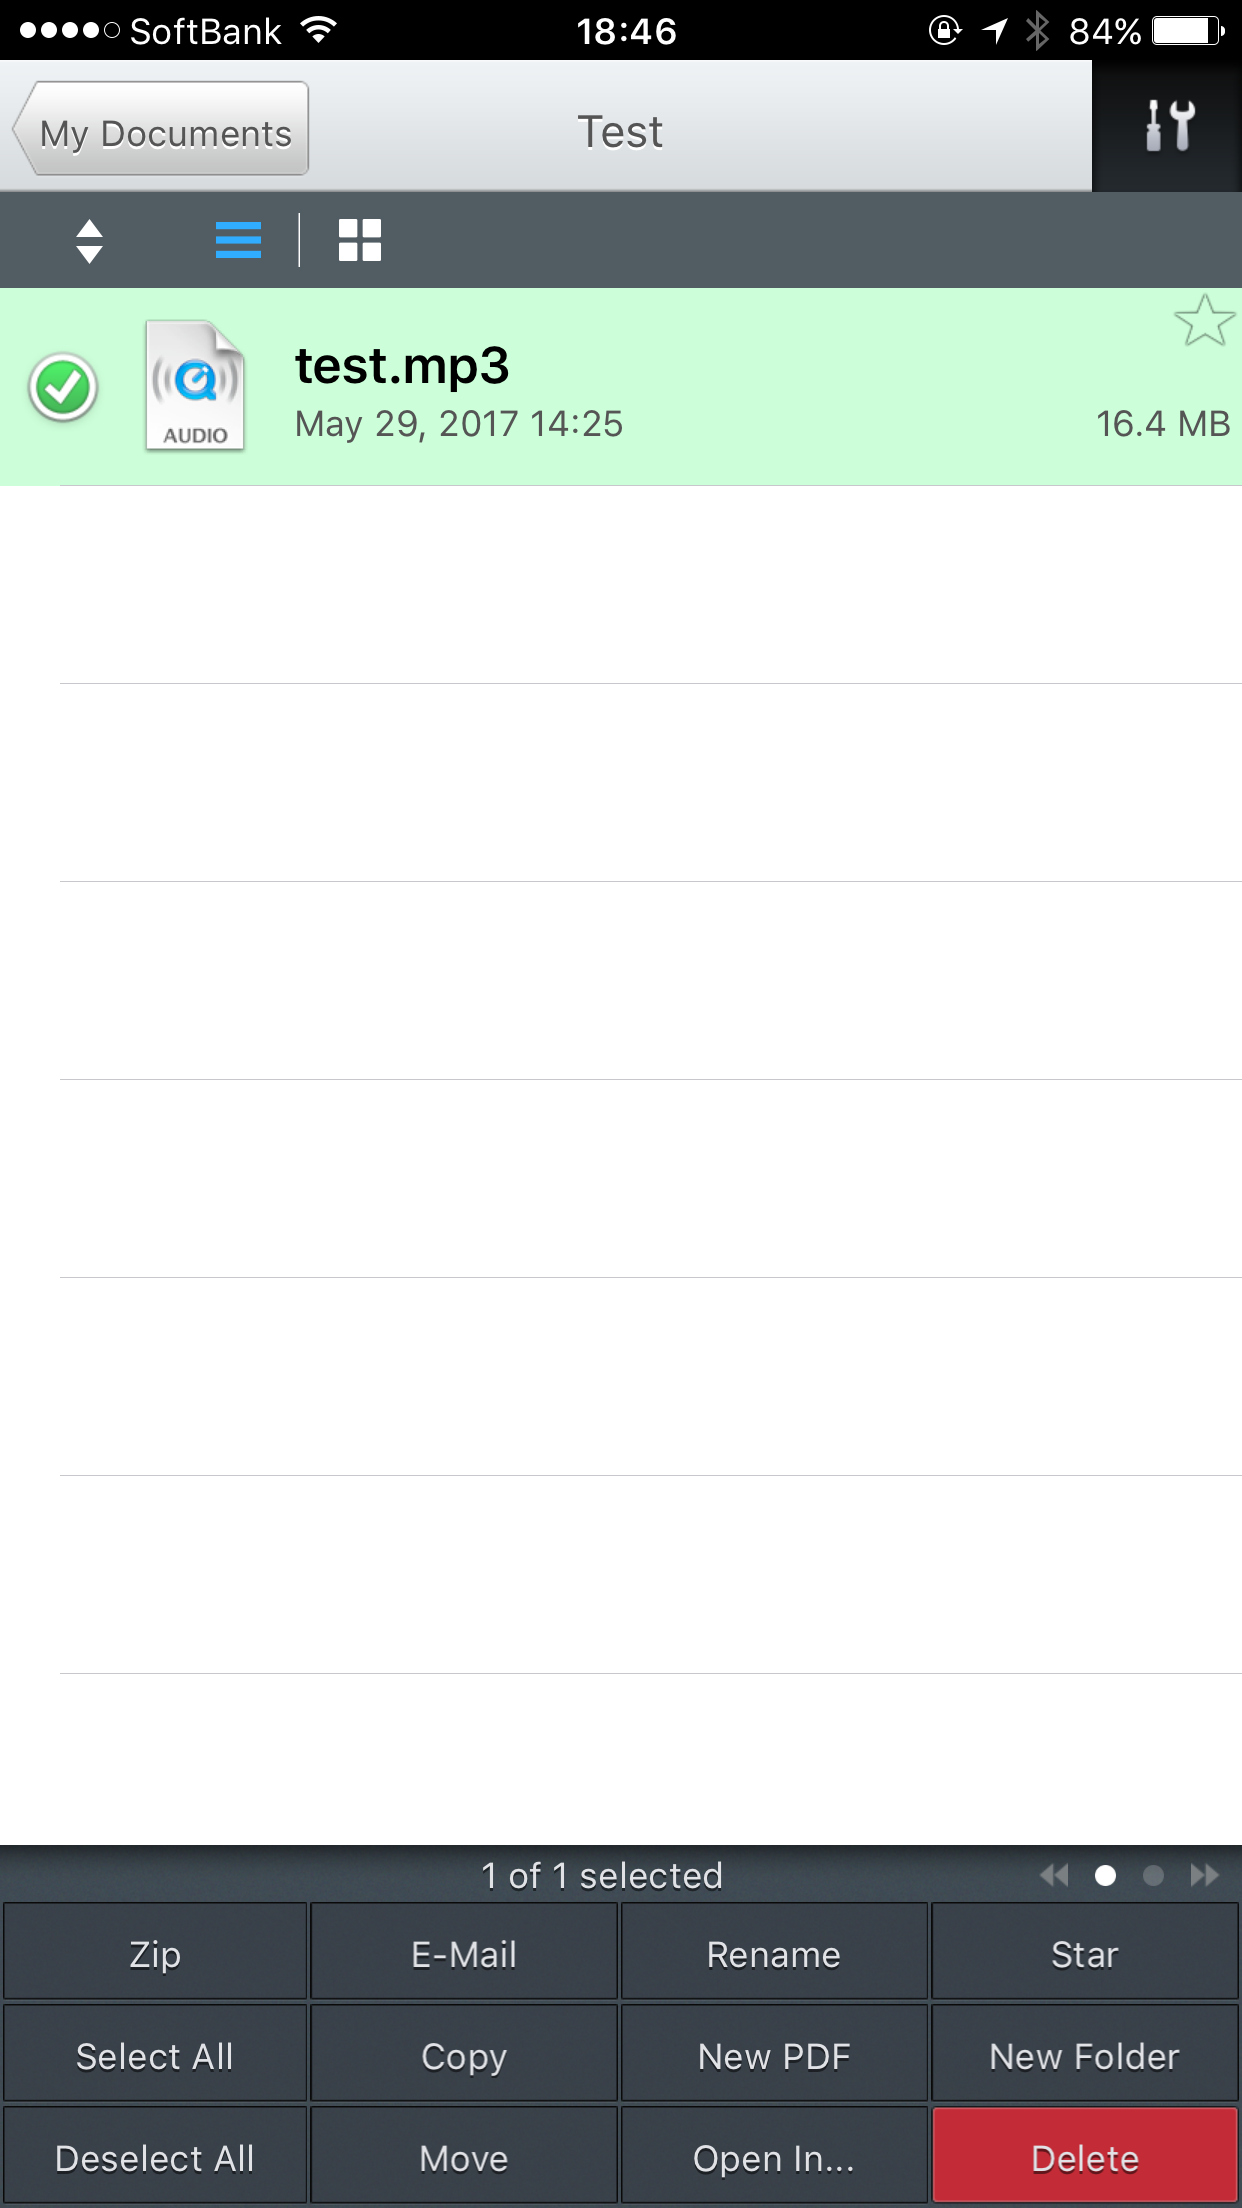
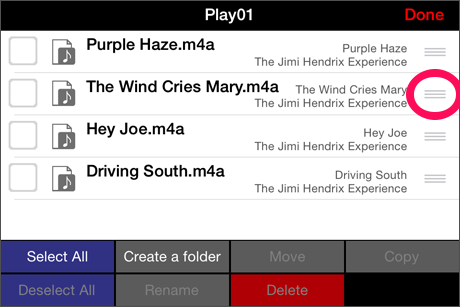
When you use this feature, tap 'edit' button at the upper right corner.
There are command buttons at the bottom of screen.
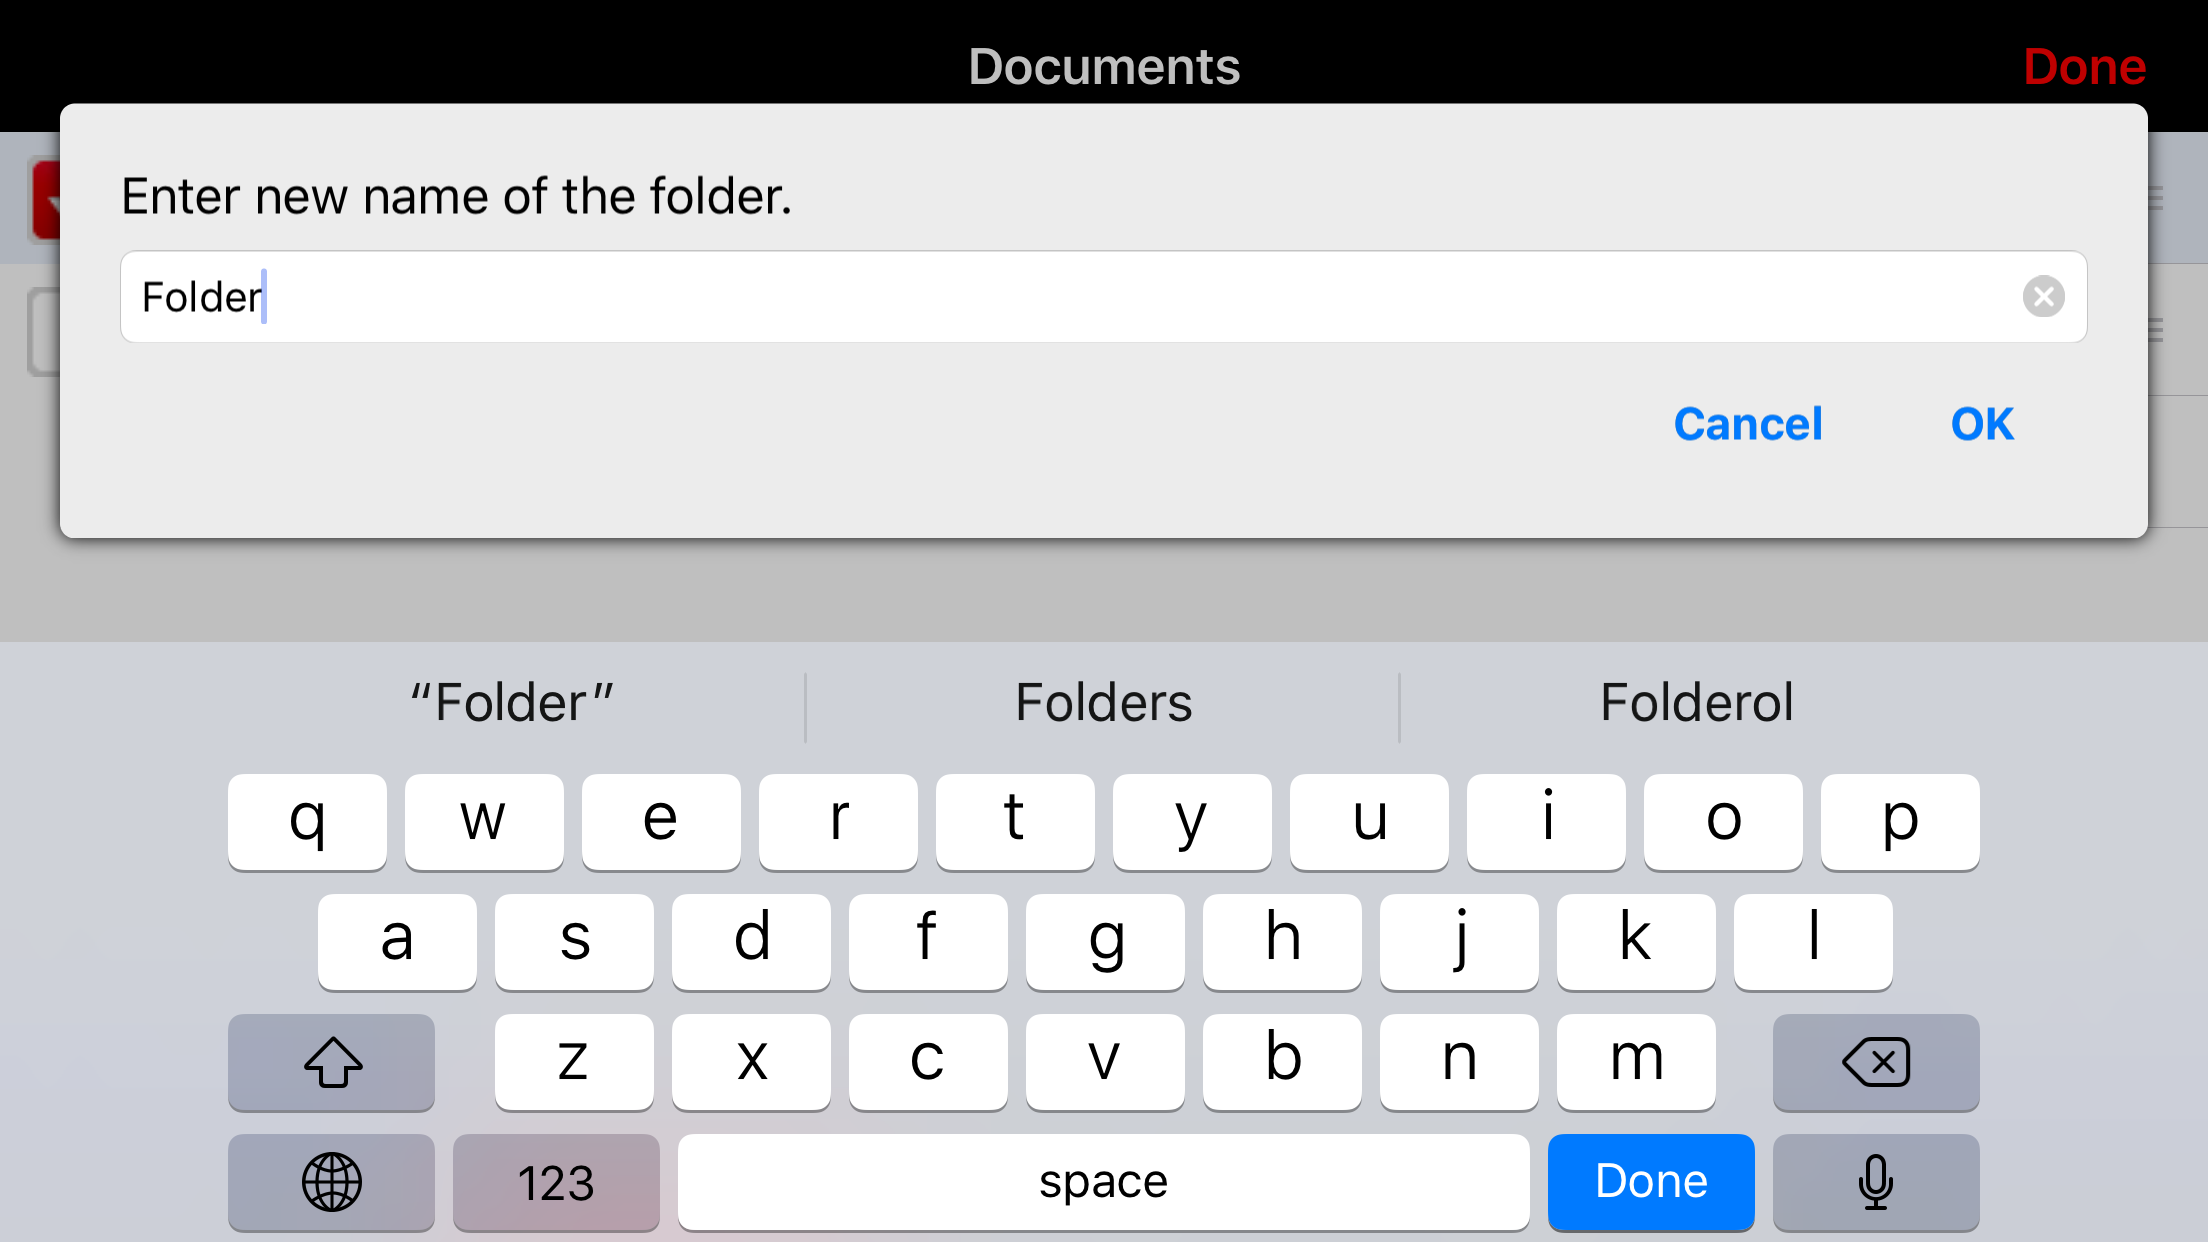
Enter folder name, tap OK. To move files to the new folder, select files, then tap 'Move' button.
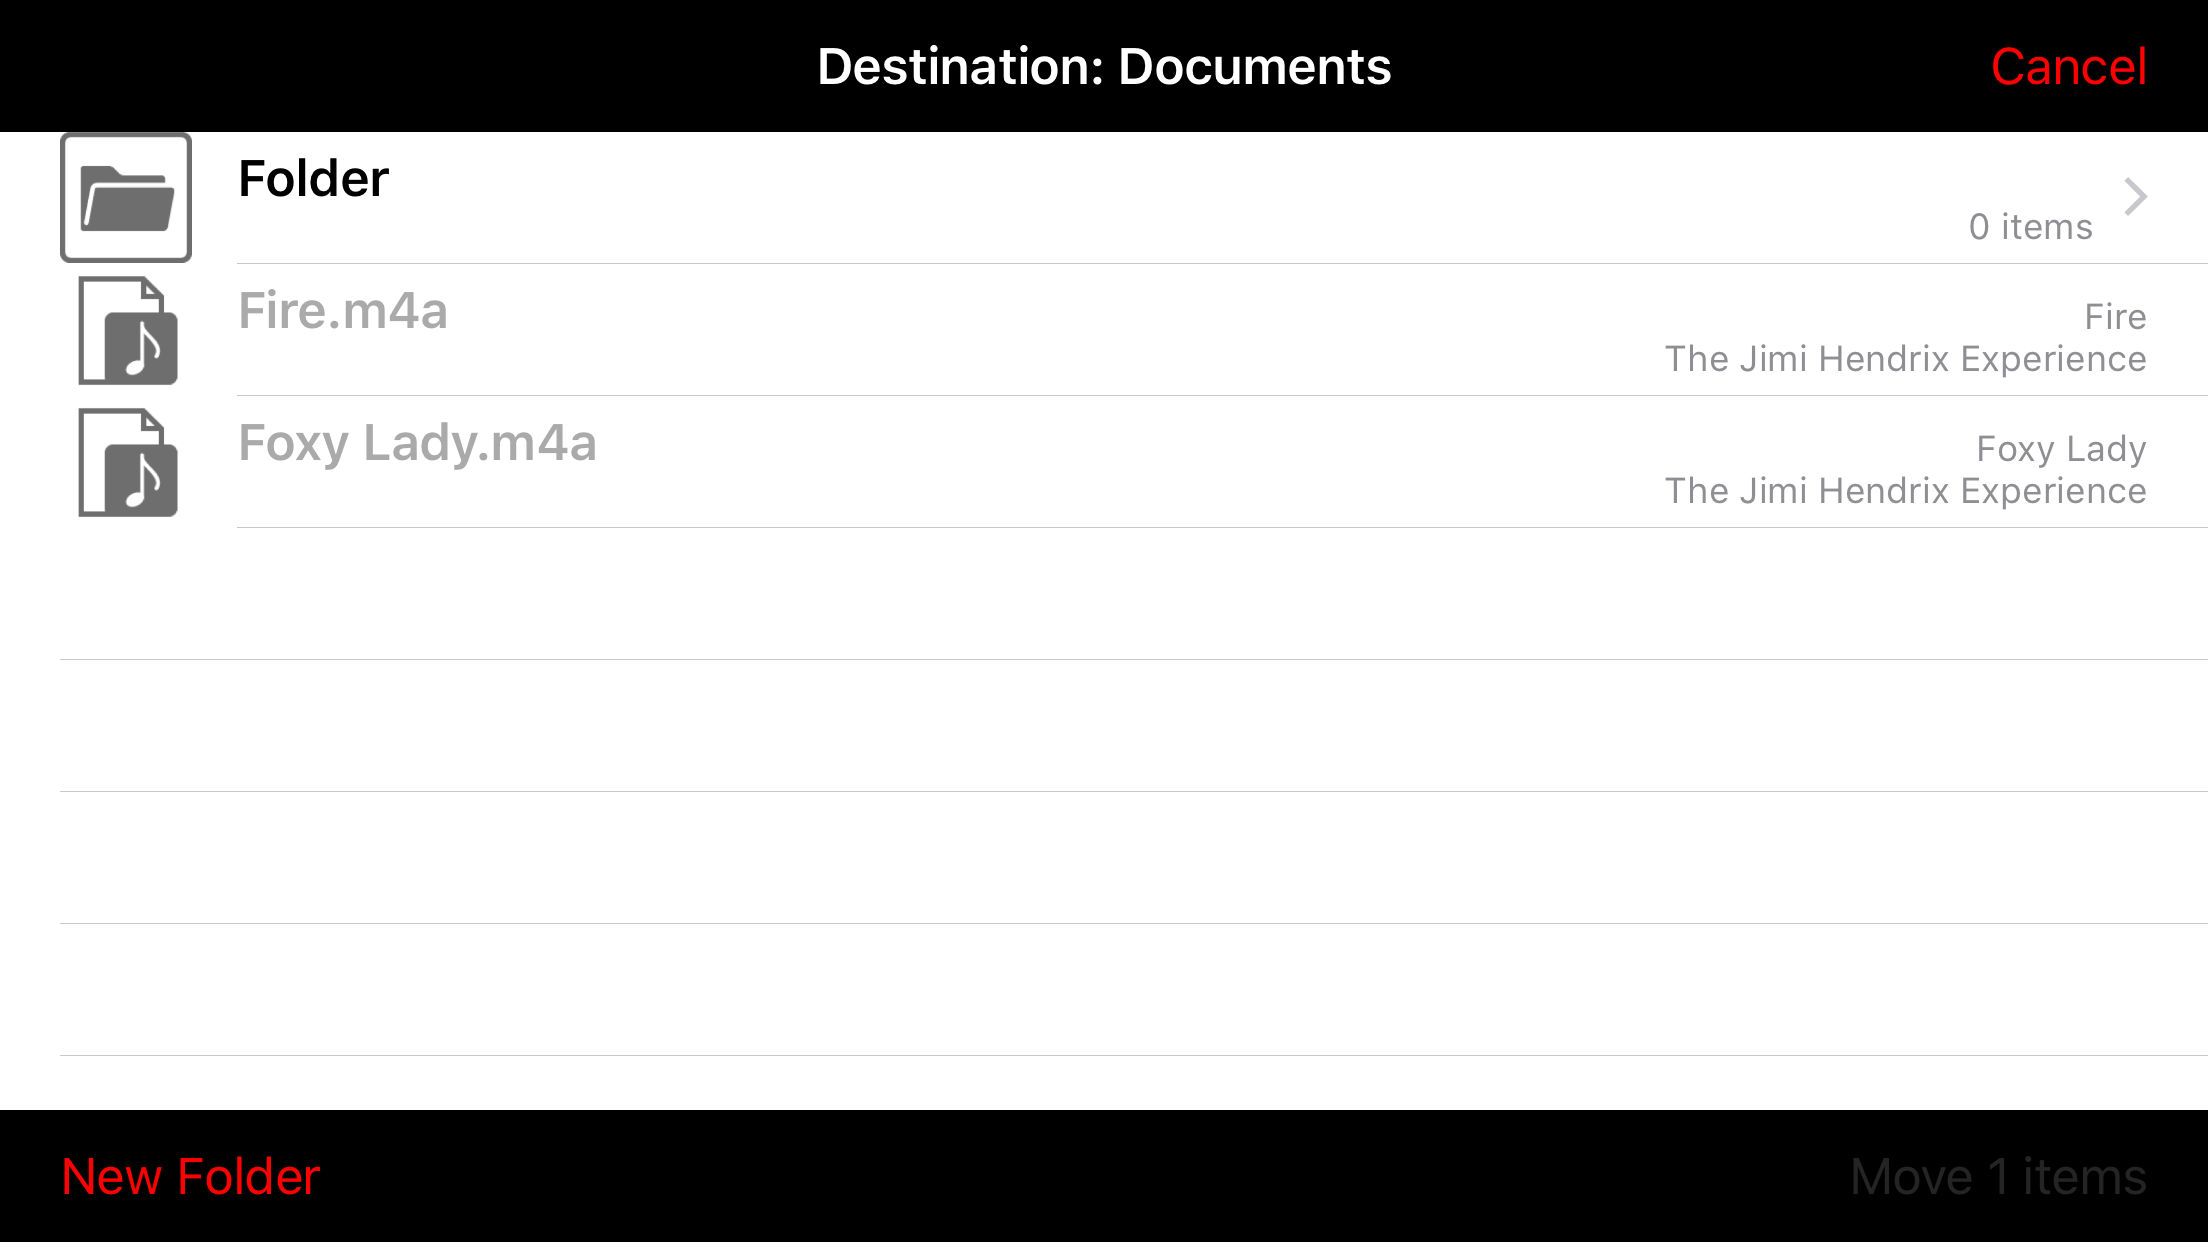
The screen to select a target folder apears.
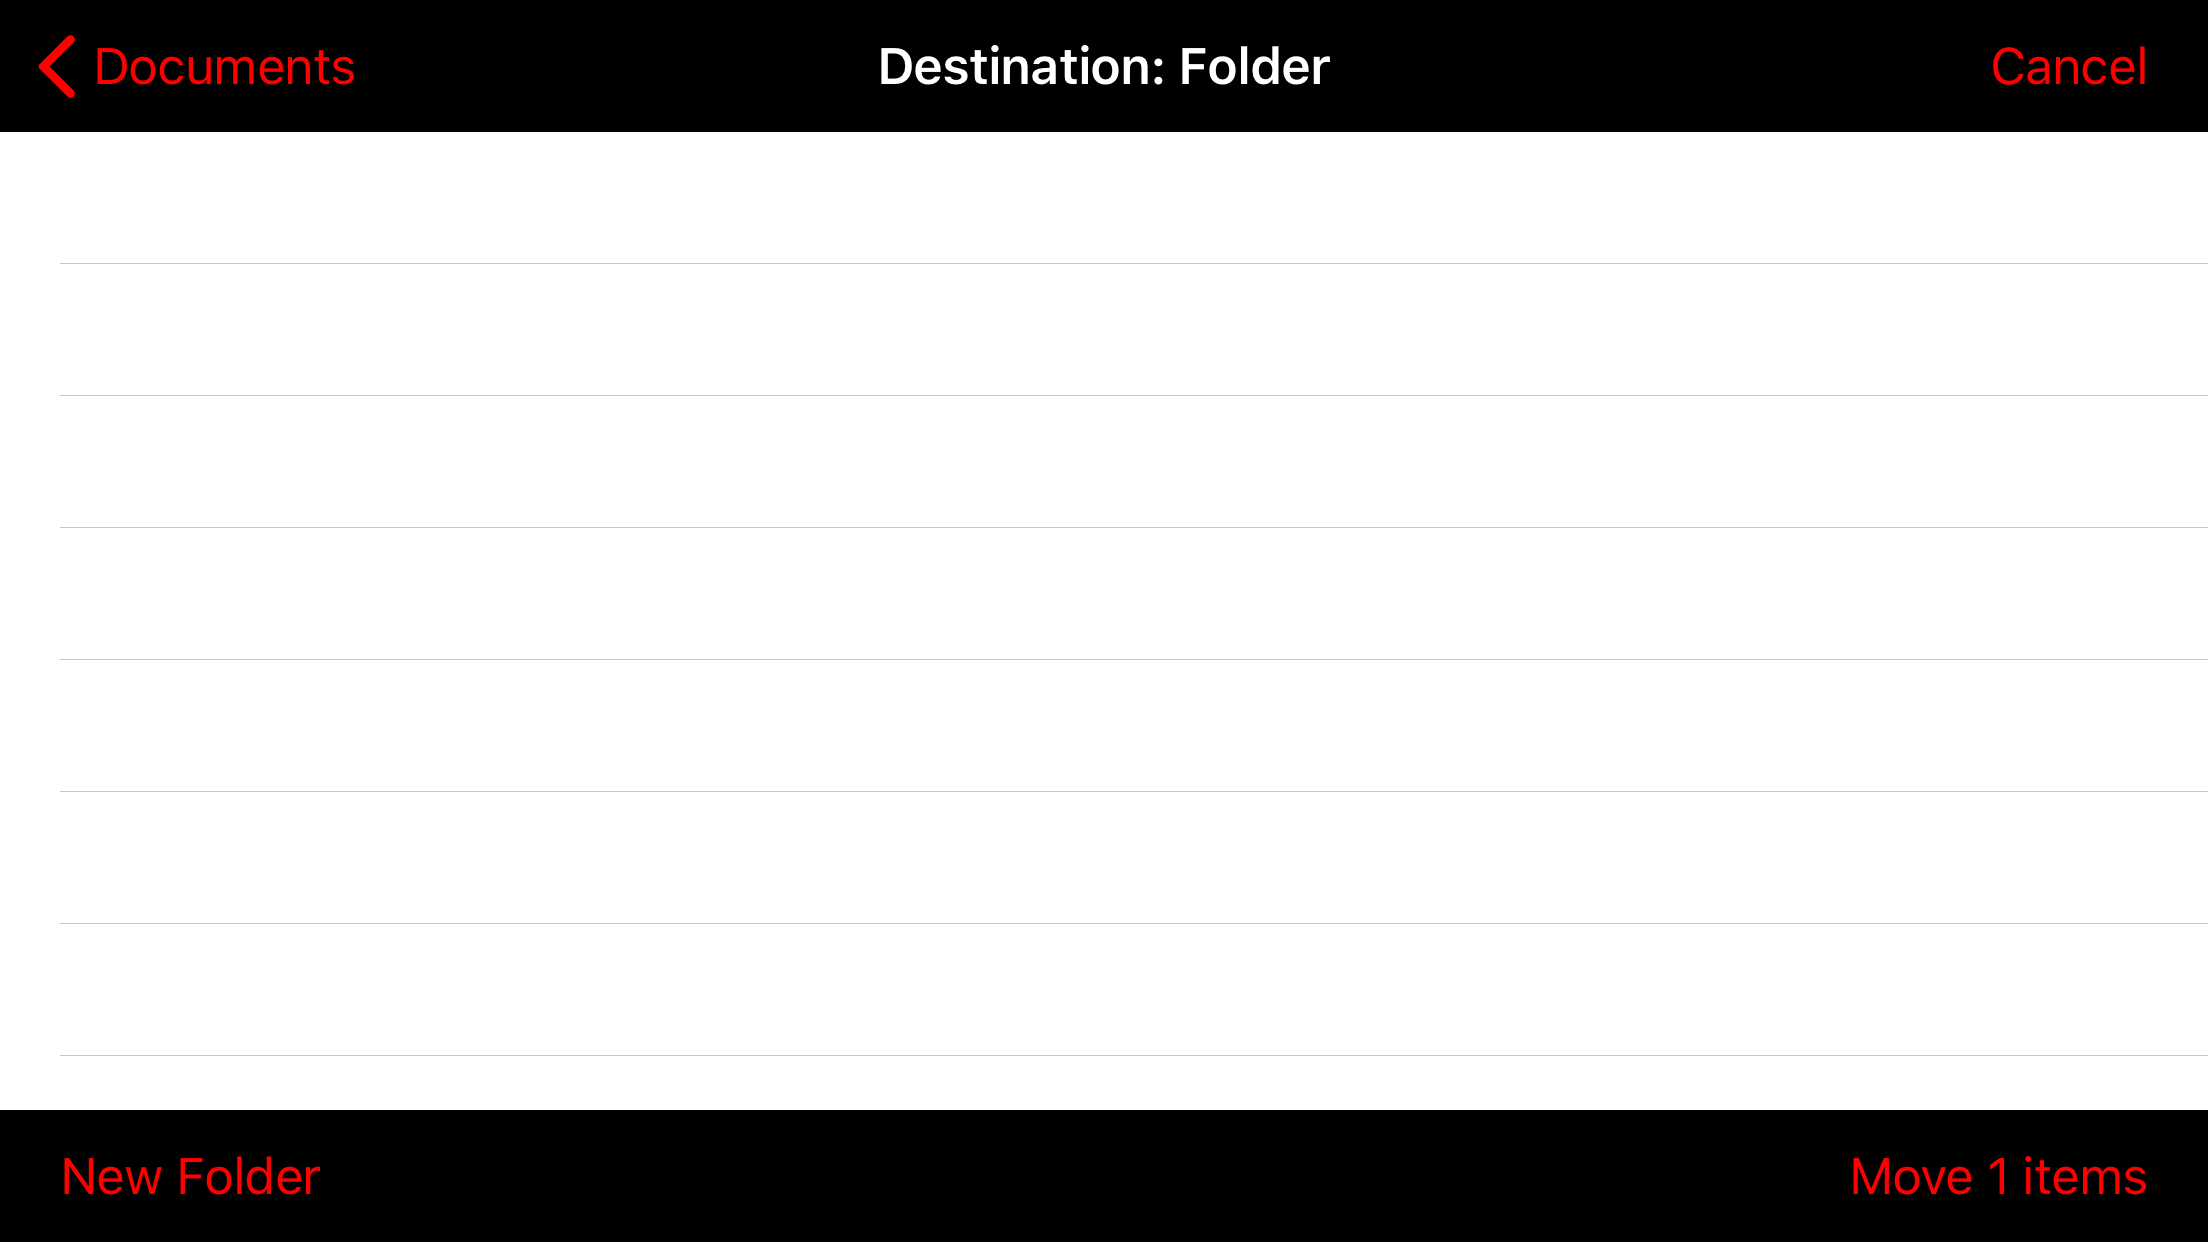
Tap a folder where you want to move to.
After goes into the target folder, tap the button(labeled Move xx items) at the side of the lower right. To delete a file, select the file and tap the "Delet" button.
Press "Shared" to display "Shared Sheet".
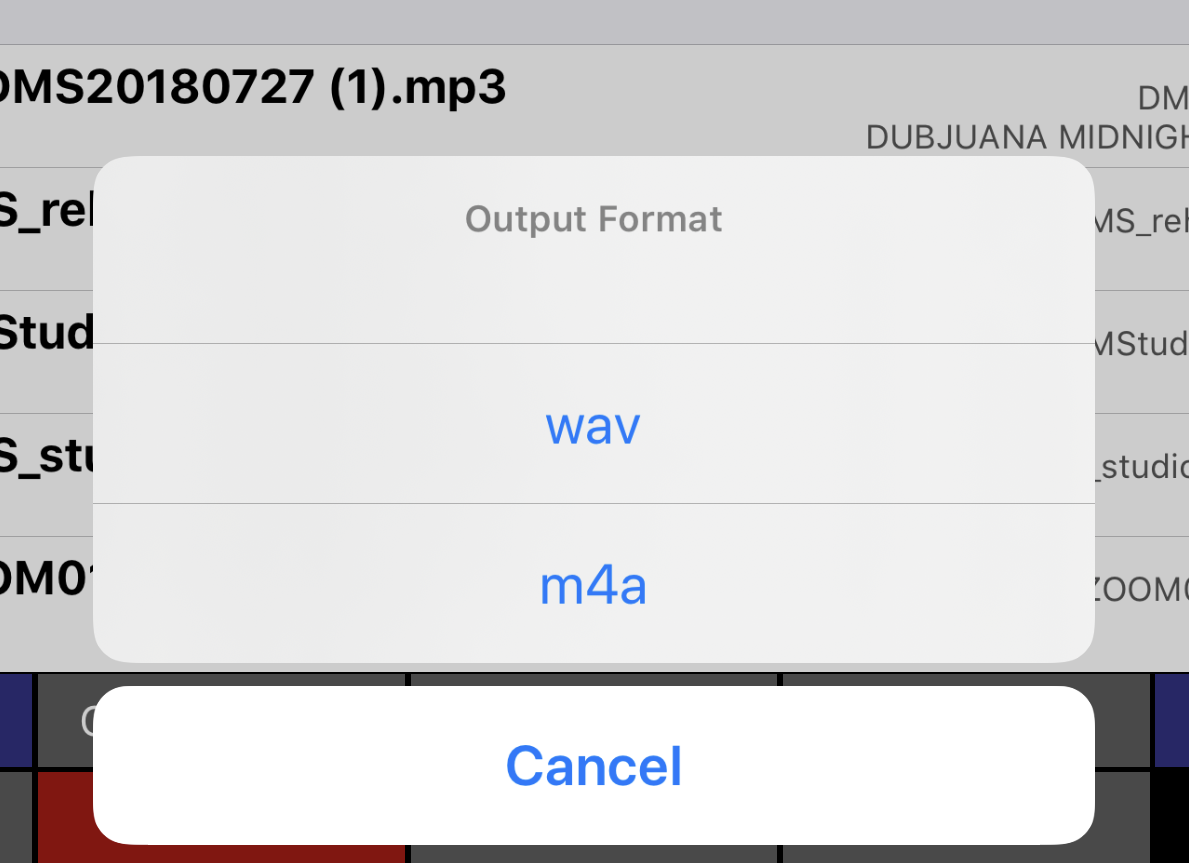
Press "Render" to render to another file that reflects the playback speed and pitch set for the selected file. |
mimiCopy loads and analyzes audio tracks before use. For this reason, the tracks must first be imported. Supported formats: mp3, m4a, aiff, wav.
(Note) For tracks purchased on iTunes Music Store, only iTunes Plus tracks (without DRM) are supported. Note that some files may not be supported even if the file format itself is supported.
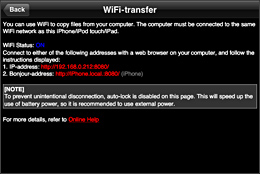 |
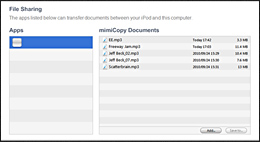
You can use WiFi to load files from a computer on the same WiFi network. Follow the instructions on the screen. |
 |
You can import tracks from the iPod library. Select the track to import. When complete, the imported tracks will be displayed in the list. To import wav and aiff tracks, update iOS to version 4.3 or later. |
 |
You can load tracks from iTunes via USB. You do not need to launch mimiCopy to import. For details, refer to iTunes' Help. |
Ver1.3.0 adds support for "Open In...".
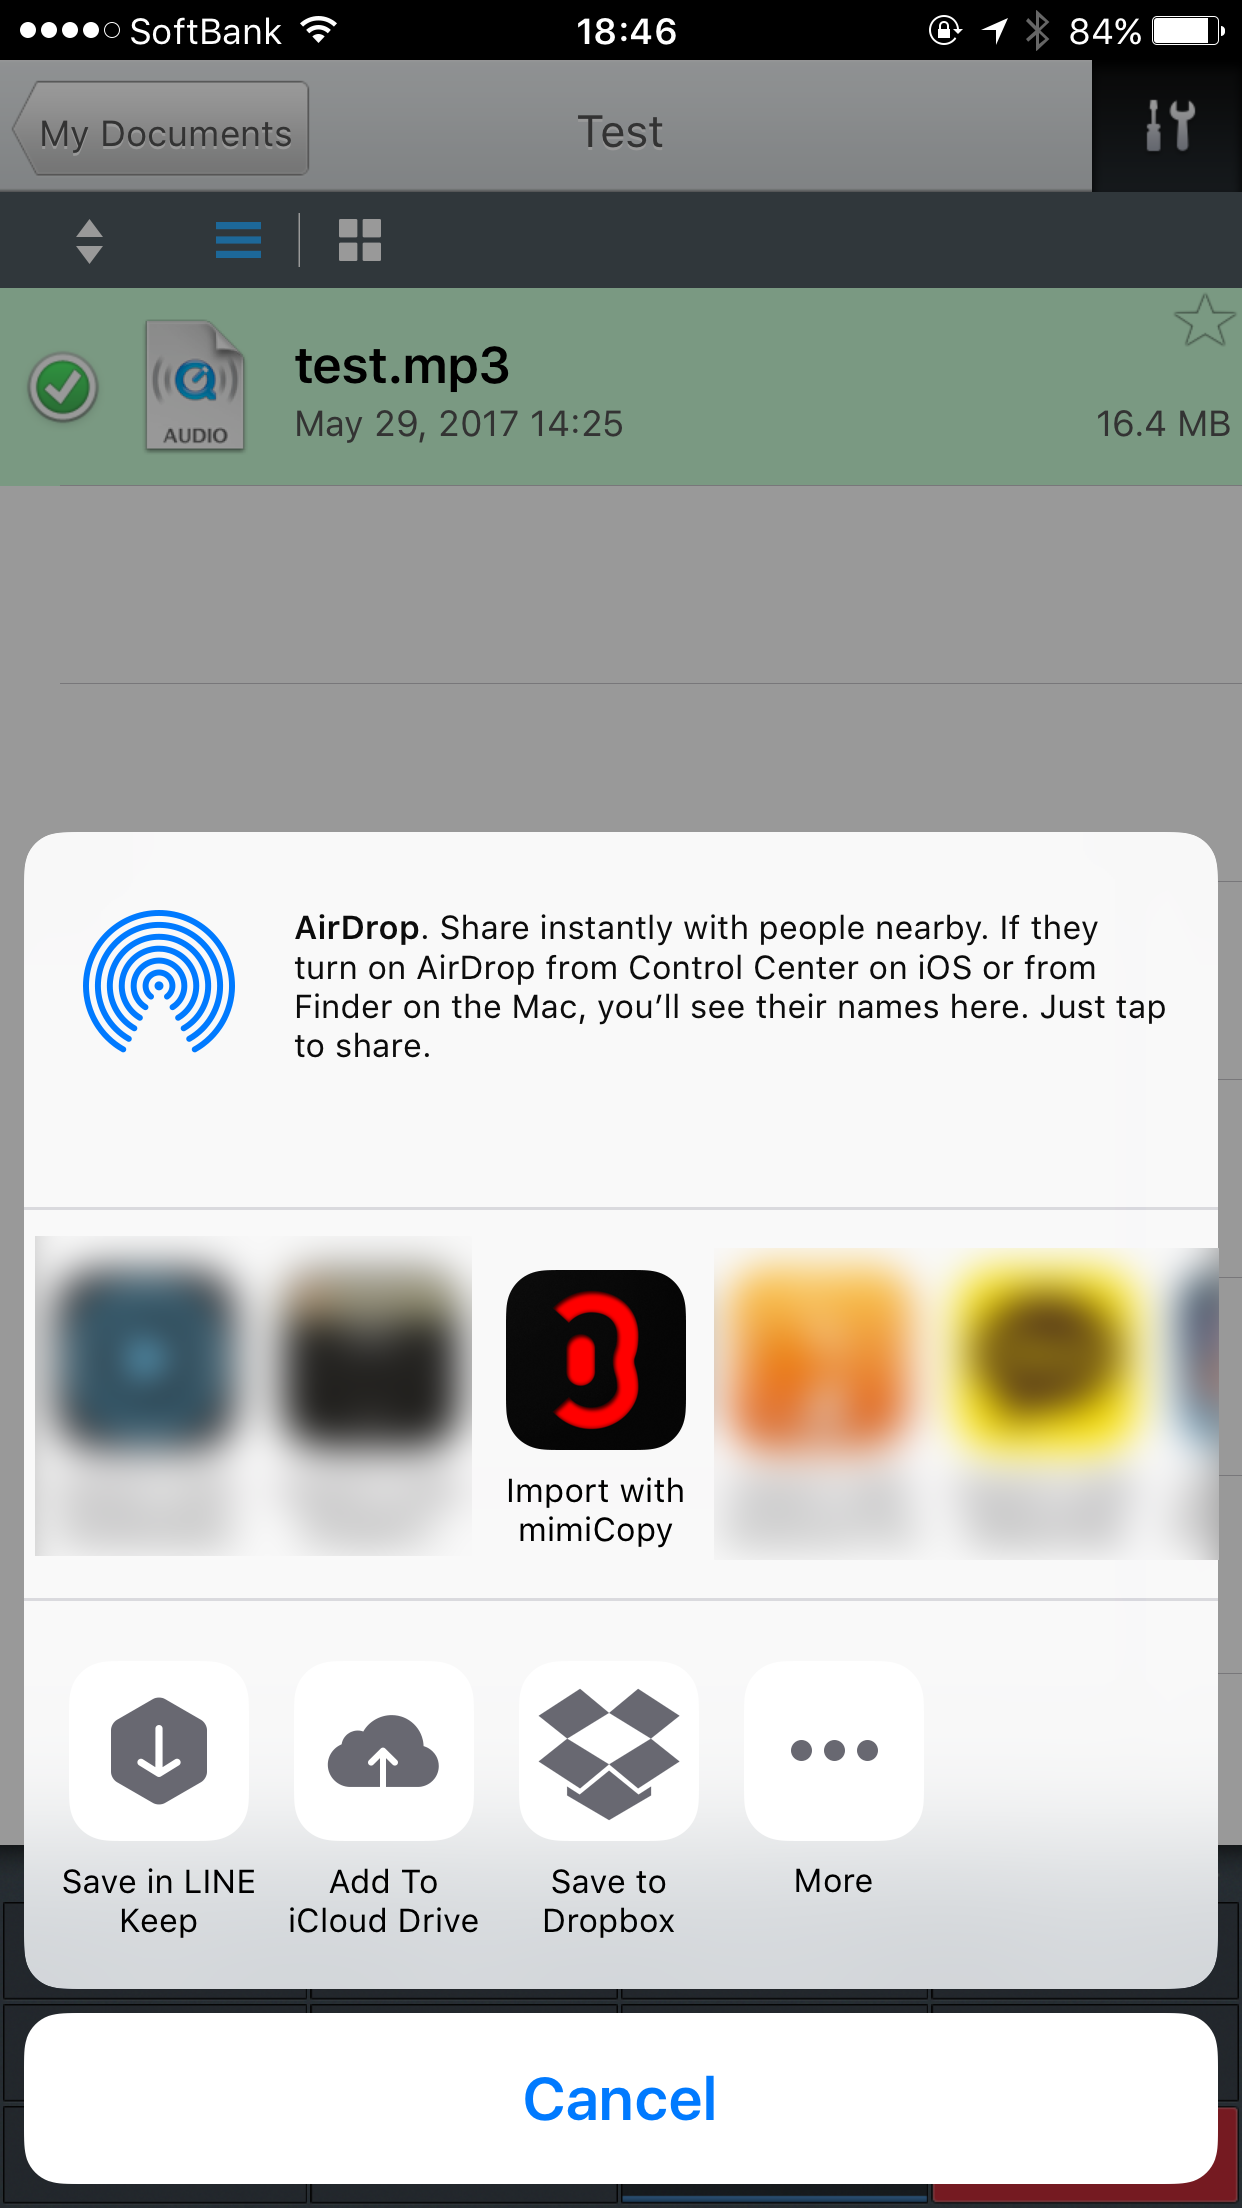
Using this function, you can import an audio file from another app. Read on for a description of how you can import a file from the GoodReader app, and from the Voice Memos app provided by iOS. |
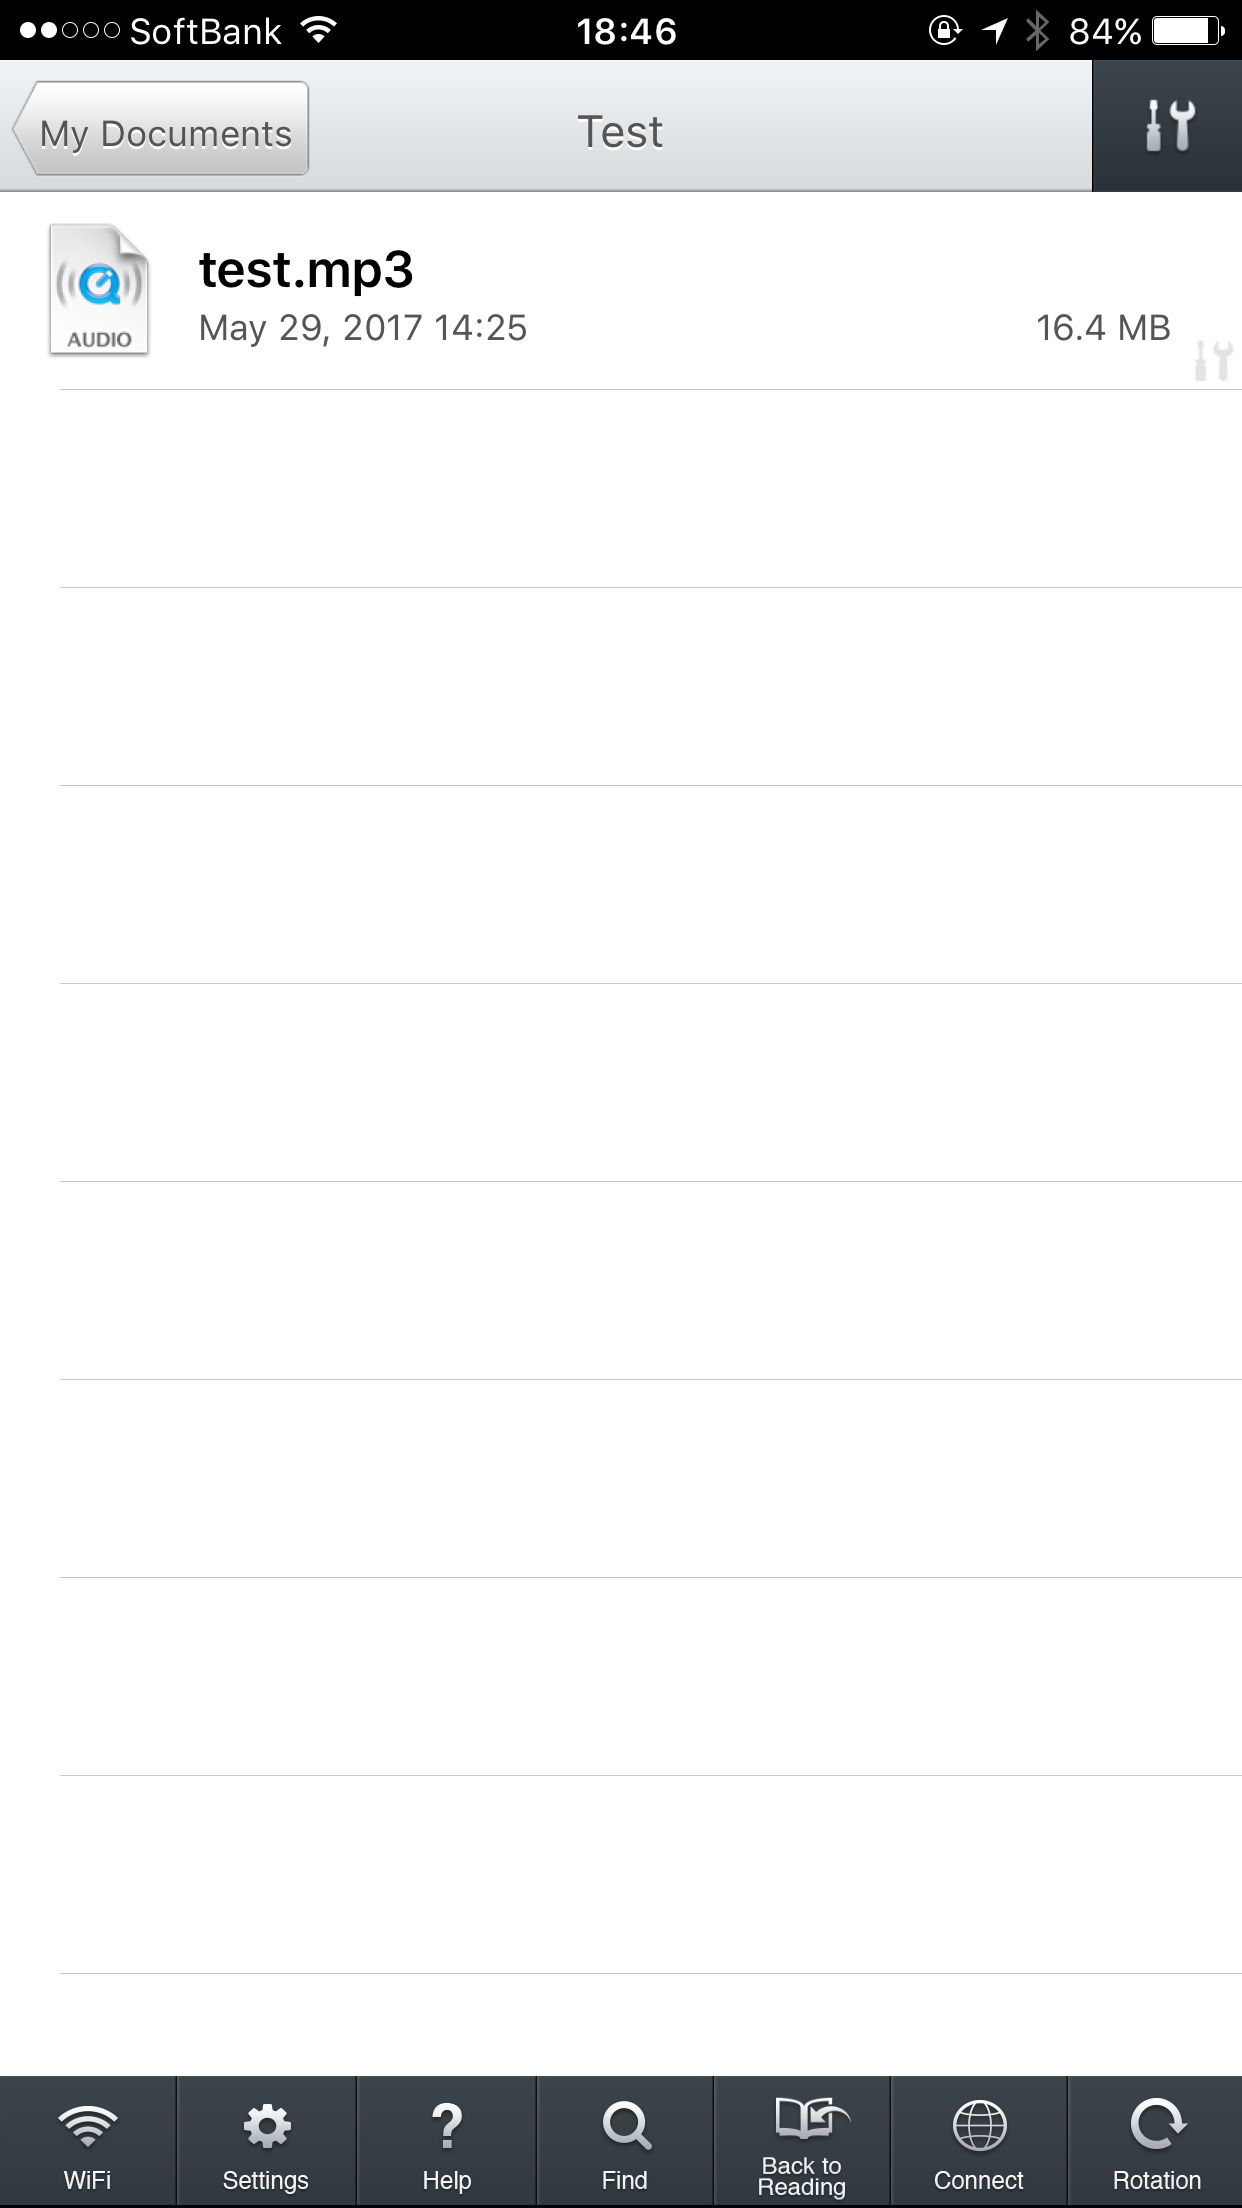
Open the GoodReader app.
mimiCopy will start automatically and import the selected file. |
|
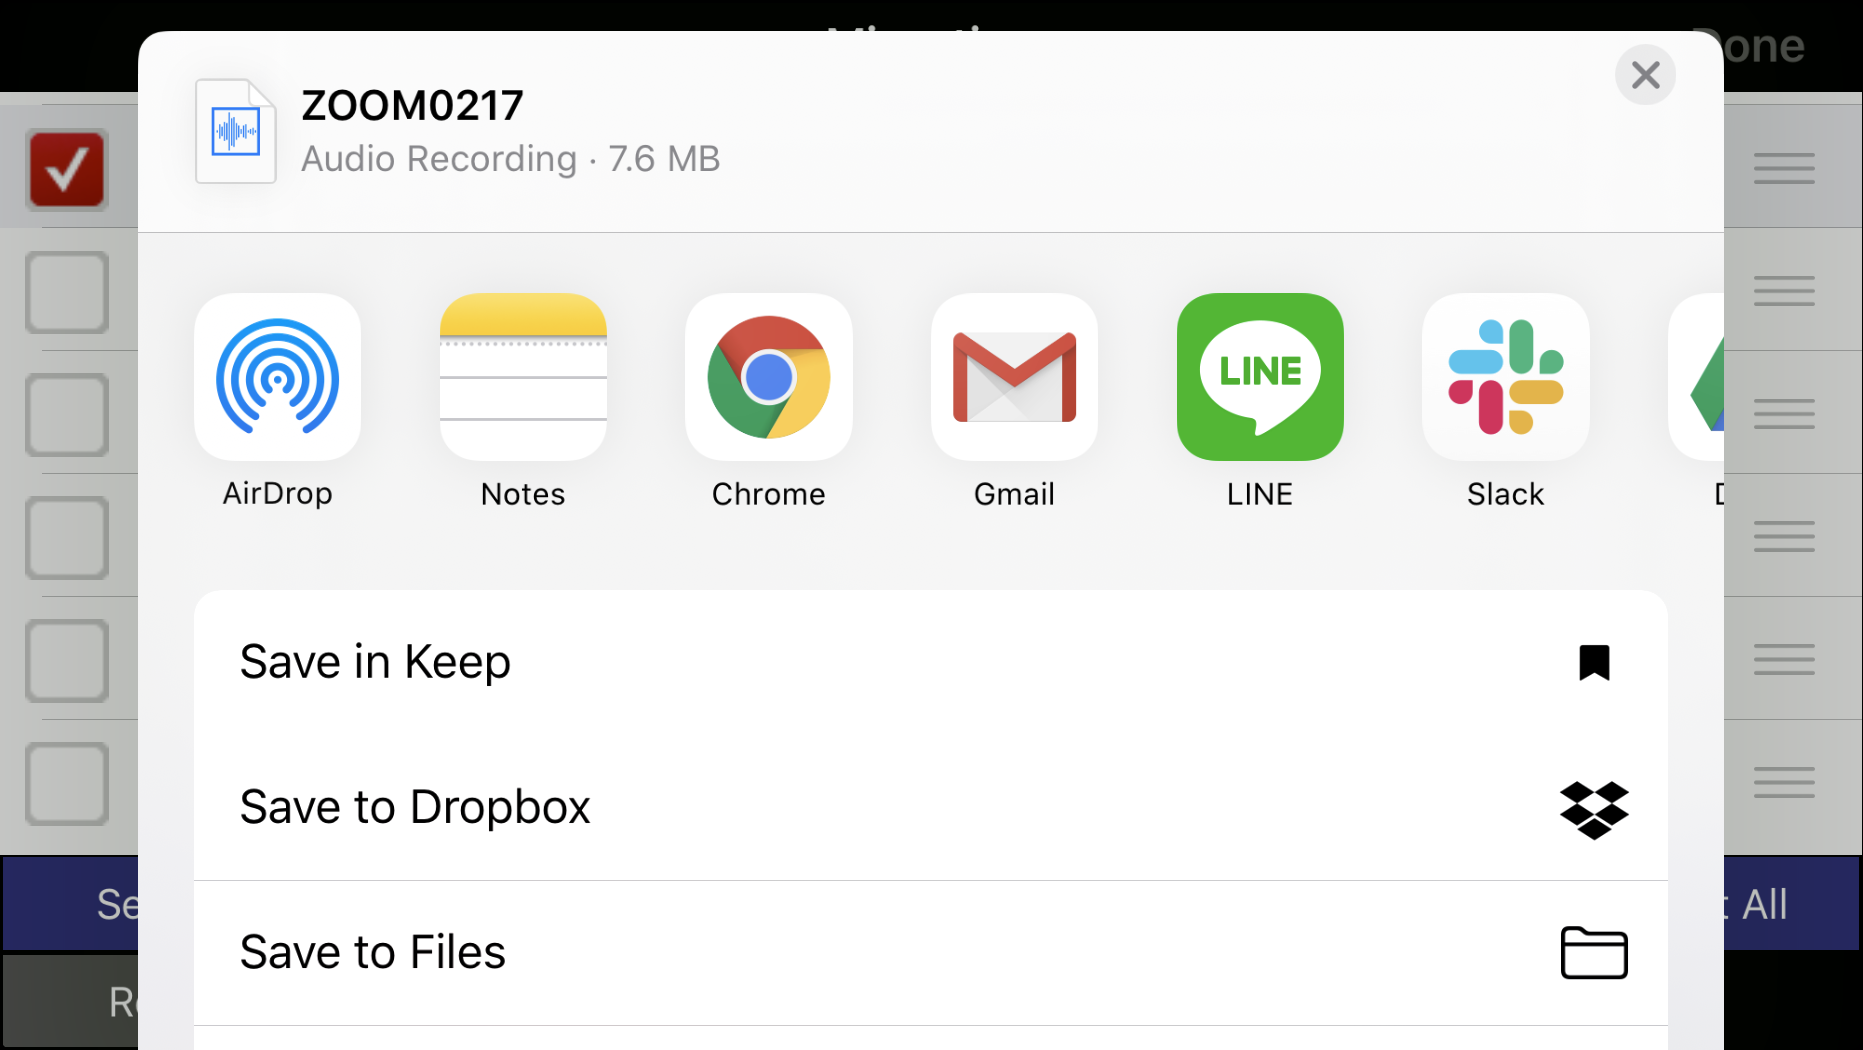
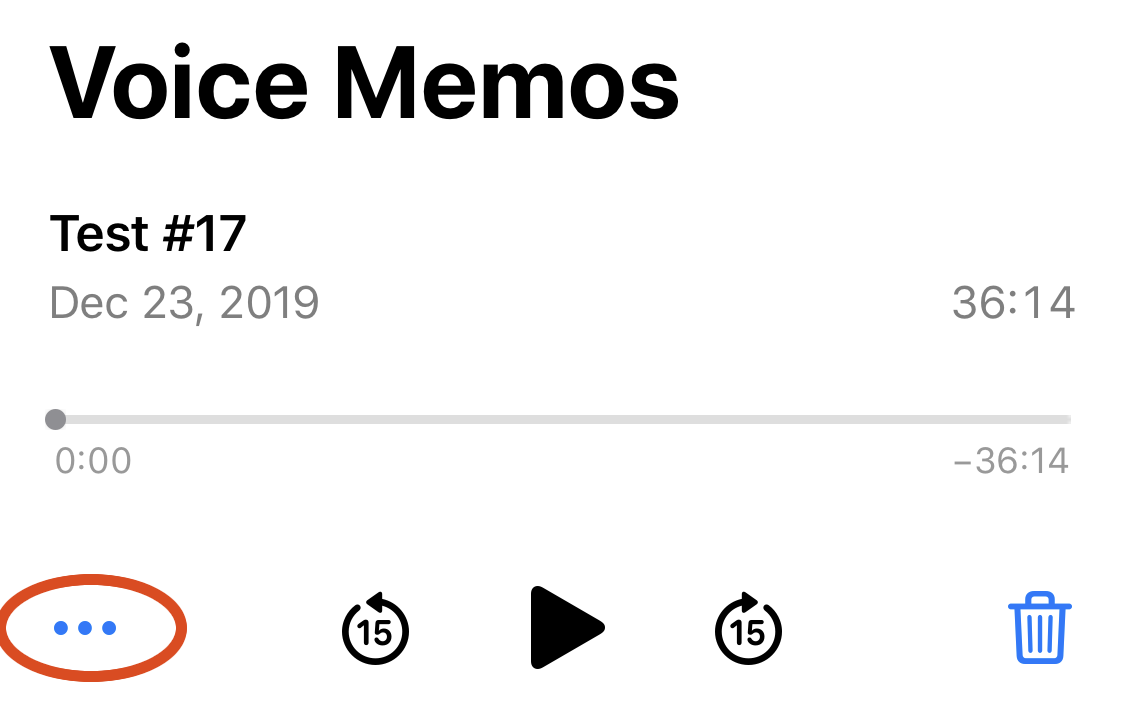
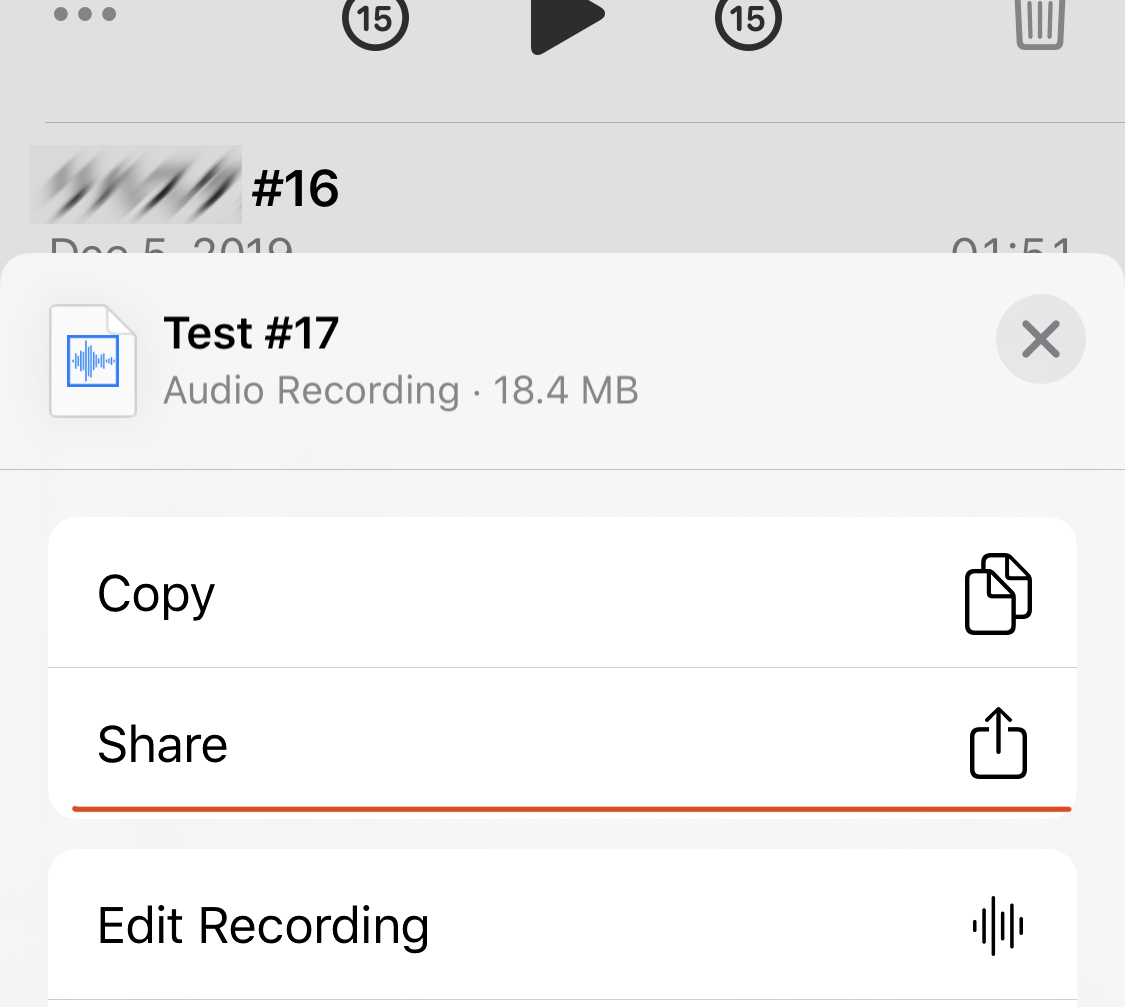
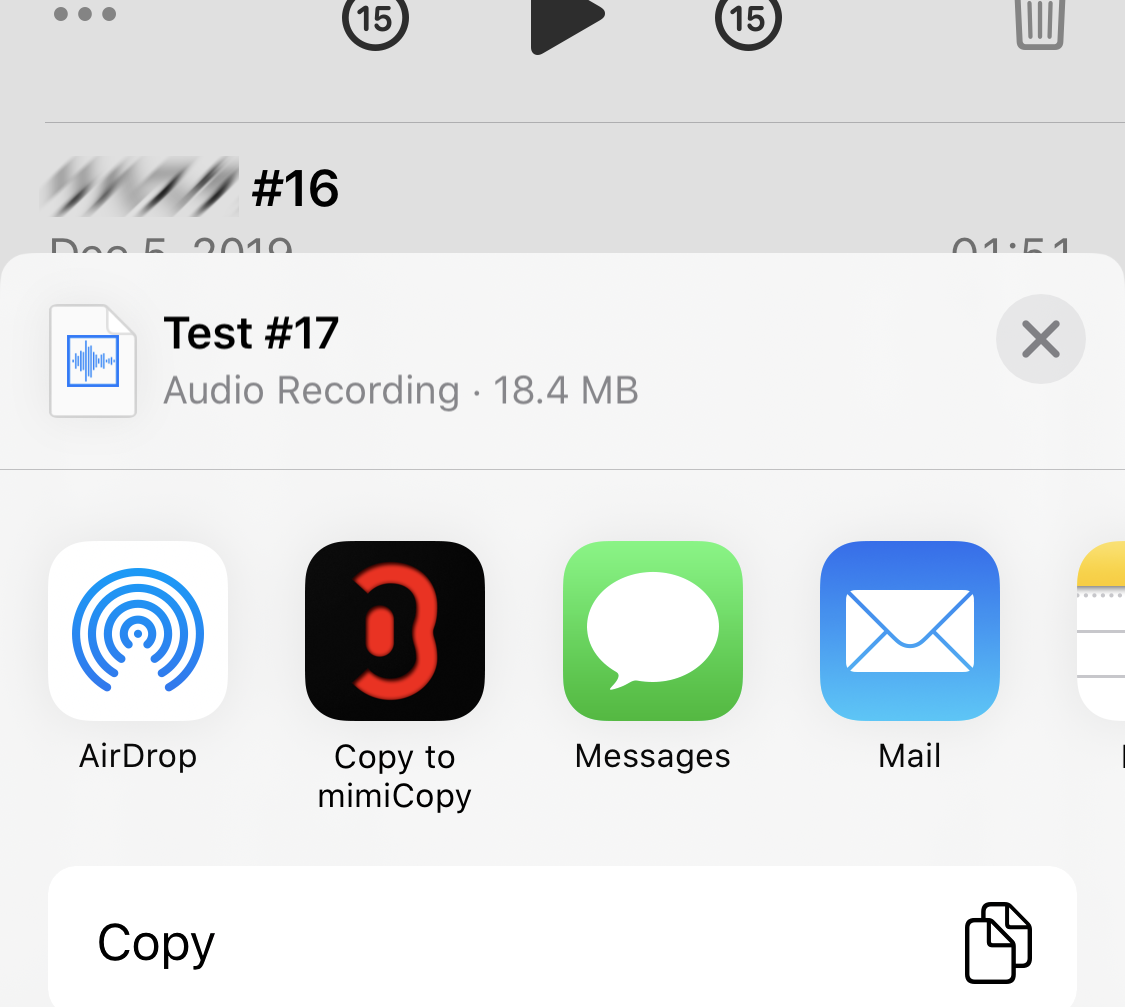
Select the recording file you want to copy to mimiCopy and press the "..." button (red circle in the figure below). A sheet similar to the one shown below is displayed. Select "Share". Select the "Copy to mimiCopy" icon as shown below. If not, scroll through the list. If you still don't see it, look for "Other" at the end of the list. When the file is copied, mimiCopy automatically starts and reads the file. |
|
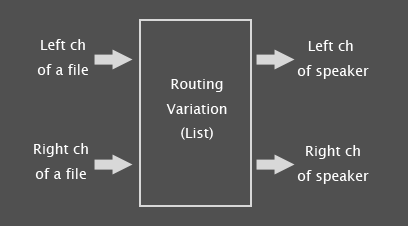
The audio routing function is a feature that enables you to change the route of the audio signal. What you can do with the Audio Routing Function- Set up the independent sound volume on mimiCopy. How to Access Audio Routing ViewTap the icon on the bottom right hand side of the screen. (For an iPad, tap the mixer icon)
After the speed/pitch setting view appears, tap the mixer icon
Tap the speed meter icon The view icon will appear on bottom right hand side of the screen when you close the view.
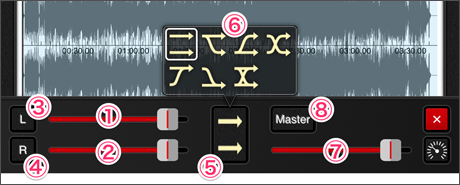
Audio Routing View Guide
(1),(2) channel fader: adjust the volume of the left and right channels of the track that is playing. The one on the top is the left (L) channel, and the one at the bottom is the right (R) channel. The default position is set at 0dB (the position shown in the image above), and you can boost the volume a little more than that.
|
| Normal routing. The left and right balance of the file and output are the same. | |
| Output the sound of left channel of the file on left and right. | |
| Output the sound of right channel of the file on left and right. | |
| Switch left and right sound output. The left channel of the file is output on the right, and the right channel of the file is output on the left. | |
| Equalize the left and right channels of the file, and output on only the left side. | |
| Equalize the left and right channels of the file, and output on only the right side. | |
| Output the left of file on left and right, and right of the file on left and right. In short, mono output. |
The feature on the pro version allows you to config more flexible routing. You can either sign up for a user registration for free or you need to upgrade to the pro version within the app. Click here for user registration.
|
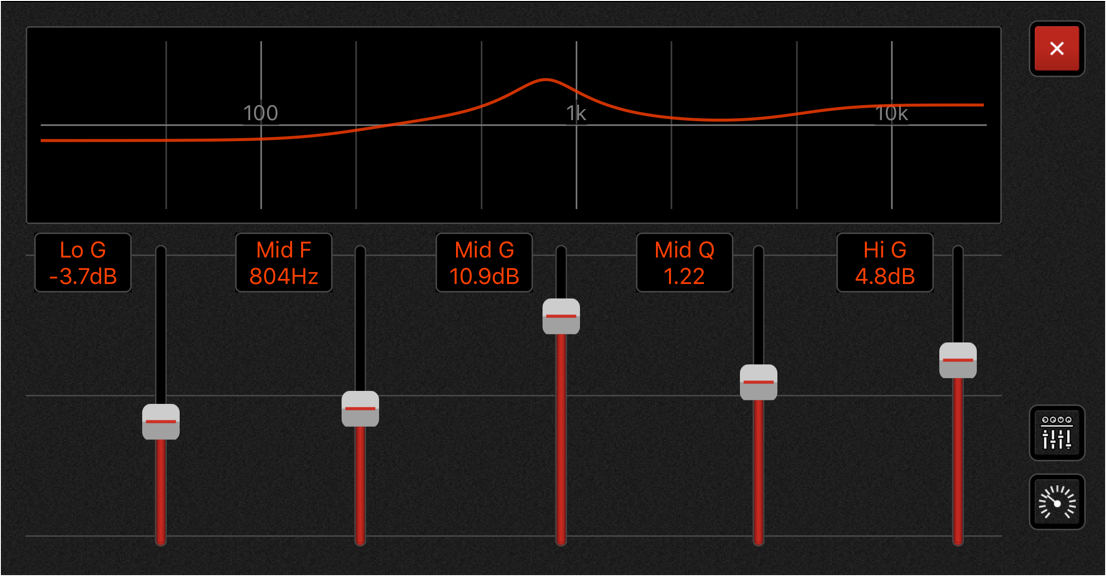
You can adjust the frequency response with the equalizer function. You can cut unwanted bandwidth or turn up the bandwidth you want to listen to. The equalizer is also reflected in the file export. The equalizer function is a pro version function. You will need to update with in-app purchases in order to use this app. Using the Equalizer Function
For iPad, please tap How to set the equalizer
The equalizer function screen looks like the following. |
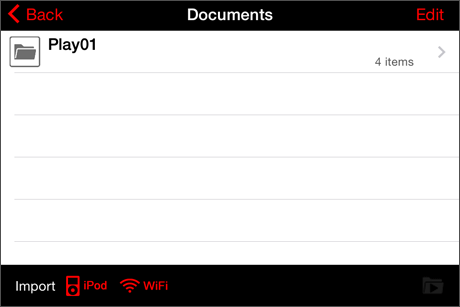
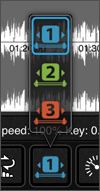
Folder playback is a feature that repeatedly plays the music in a folder in order. Even during folder playback, the playback speed and pitch (key) that you set up for each track will be played. Via the setting options, you can select to activate or deactivate the loop setting during folder playback. The default setting is off. How to Replay the Music in the FolderMove to ‘File view’ and create a folder.
Move the files to the folder.
Select the playback order within the folder.
Tap the folder playback button when you're in the same folder as the folder playlist you want to hear. (Button on lower right hand side)
It will go into folder playback mode and take you to the main screen. Then tap the playback button to start the music in the folder. During folder playback, the folder playback icon will appear in the title bar.
You can also pause the playback, change the loop interval, and adjust the speed during folder playback.
|
It's a feature that enables you to save text memos for each track.
[note] The feature on the pro version allows you to memo. You can either sign up for a user registration for free or you need to upgrade to the pro version within the app. Click here for user registration. |
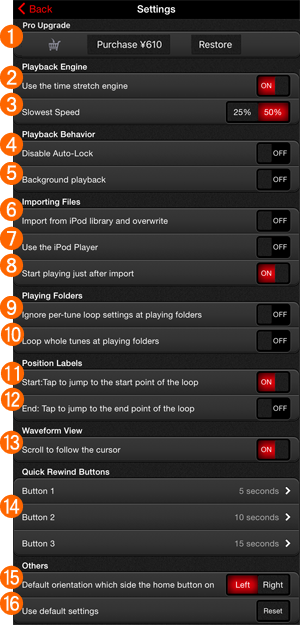 |
You can upgrade to pro version by in-app purchase. If you have already purchased it, you can recover it by pressing the 'Restore' button. When OFF, Speed control will be like a tape system. Set the minimum value of speed(time-stretching) slider When ON, Auto-Lock will be disabled while the main view is open. When ON, background playback will be enabled. mimiCopy will continue to play audio in the background of other apps. When OFF, The occasion with the file of the same name isn't overwritten already, and it's preserved under the different name automatically. It isn't recommended to turn ON. When OFF, A-B loop are ignored while folder play(playlist). Displays online help. A network connection is required. When ON, the waveform view will scroll automatically to keep the current position on the screen. Sets the number of seconds for the "Quick Rewind" buttons. Restores default settings. |
 Shifts the pitch by a semitone (half step, half tone). 1 unit = 1 semitone. You can shift the pitch up or down by up to 1 octave.
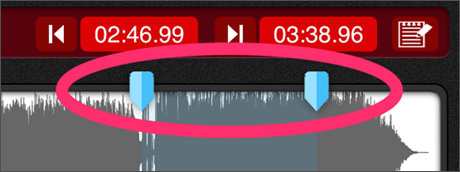
 button to set the current position as the end position of the loop and exit the dialog.